

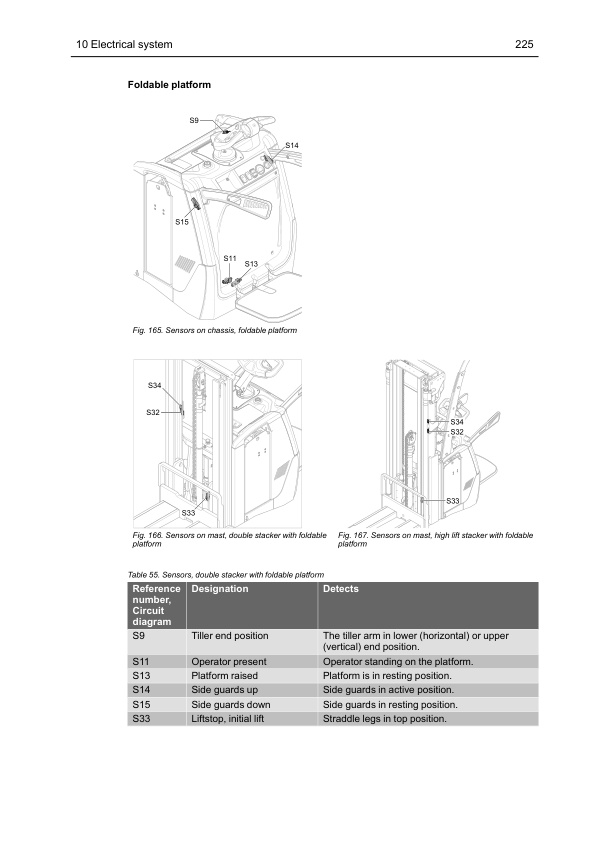
Mitsubishi PBV20N3D to SBF16N3SS Service Manual SM23GB1DHSA3
$50.00
- Type Of Manual: Service Manual
- Manual ID: SM23GB1DHSA3
- Number of Pages: 286
- Size: 14.0MB
- Format: PDF
Product details
-
Model List:
- PBV20N3D, PBF20N3DR, PBF20N3DS, SBV12N3, SBF12N3R, SBF12N3S, SBV12N3I, SBF12N3IR, SBF12N3IS, SBV16N3, SBF16N3R, SBF16N3S, SBV16N3I, SBF16N3IR, SBF16N3IS, SBV16N3S, SBF16N3SR, SBF16N3SS
- 1. GENERAL INFORMATION AND TECHNICAL DATA
- 1.1. Introduction
- 1.1.1. General
- 1.1.2. The trucks
- 1.1.3. Authorised service personnel
- 1.1.4. Symbol key
- 1.2. Safety
- 1.2.1. General
- 1.2.2. Safety instructions
- 1.2.3. Truck modification
- 1.2.4. Lifting the truck
- 1.2.5. Welding on truck
- 1.2.6. Gas spring
- 1.3. Environmental considerations
- 1.3.1. We respect the environment
- 1.4. Preparations
- 1.4.1. Service
- 1.4.2. Troubleshooting
- 1.5. Truck data
- 1.5.1. Machine plates
- 1.5.2. Safety and warning signs
- 1.5.3. Type designation
- 1.5.4. Truck types
- 1.5.5. Weights, double stacker
- 1.5.6. Weights, high lift stacker
- 1.5.7. Dimensions double stacker – Duplex (T)
- 1.5.8. Dimensions high lift stacker, load capacity 1250 kg – Duplex (TV/TFV)
- 1.5.9. Dimensions high lift stacker, load capacity 1600 kg – Duplex (TFV)
- 1.5.10. Dimensions high lift stacker, load capacity 1600 kg – Triplex (DTFV)
- 1.5.11. Miscellaneous
- 1.6. Component placement
- 1.7. Component specification
- 1.8. Recommended consumable materials
- 1.8.1. Oil and grease types
- 1.9. Code explanations
- 1.9.1. Colour codes for wiring diagrams
- 1.9.2. Designations for electrical components in electrical diagram
- 1.9.3. Standard abbreviations and units
- 1.9.4. Acronyms and abbreviations
- 2. SPECIAL TOOLS
- 2.1. List of tools
- 3. SERVICE
- 3.1. Service schedule / inspection
- 3.1.1. Introduction
- 3.1.2. Safety
- 3.1.3. Service schedule explanation
- 3.1.4. Inspection daily / monthly / PDI and commissioning
- 3.1.5. First service (200 hours)
- 3.1.6. Main service
- 3.1.7. Extra service inspections
- 3.1.8. Service inspection
- 3.1.9. Dye penetration inspection instruction
- 3.2. Service Schedule
- 3.3. Lubrication
- 3.3.1. Recommended lubricants
- 3.3.2. Symbol key, lubrication chart
- 3.3.3. Lubrication chart
- 3.4. Specific instructions
- 3.4.1. Traction motor
- 3.4.2. Gearbox
- 3.5. Maintaining the battery (not for Li-ION)
- 3.6. Battery servicing
- 4. CHASSIS
- 4.1. Design and function
- 4.1.1. Machine housing
- 4.1.2. Covers and panels
- 4.1.3. Wheel system
- 4.1.4. Wheels
- 4.1.5. Friction force system, double stacker
- 4.1.6. Adjustable damped floor (option for fixed platform truck variants)
- 4.2. Repair and maintenance instructions
- 4.2.1. Before work is performed
- 4.2.2. Remove and install panels and covers
- 4.2.3. Remove and install the side protection gates
- 4.2.4. Remove and install the platform damper (option)
- 4.2.5. Wheels
- 4.2.6. Friction force system, double stacker
- 5. DRIVE UNIT
- 5.1. Design and function
- 5.1.1. Description
- 5.1.2. Traction Motor
- 5.1.3. Gearbox
- 5.1.4. Drive wheel
- 5.2. Repair and maintenance instructions
- 5.2.1. Before work is performed
- 5.2.2. Servicing and maintenance
- 5.2.3. Traction motor
- 5.2.4. Gearbox
- 5.2.5. Drive wheel
- 5.3. Diagnostics and troubleshooting
- 5.3.1. Troubleshooting chart
- 6. MAST SYSTEM
- 6.1. Design and function
- 6.1.1. Mast systems
- 6.1.2. Initial lift (option for high lift stacker)
- 6.1.3. Fork carriage
- 6.1.4. Link system
- 6.2. Repair and maintenance instructions
- 6.2.1. Before work is performed
- 6.2.2. Leaning angle of truck, adjustment
- 6.2.3. Initial lift
- 6.2.4. Fork carriage
- 6.2.5. Inspection of welded fork carriages
- 6.2.6. Inspection of forged forks
- 6.2.7. Lift chains
- 6.2.8. Link system
- 6.2.9. Wheels
- 6.2.10. Closed pallet entry and exit (option for double stacker)
- 6.3. Diagnostics and troubleshooting
- 6.3.1. Troubleshooting chart
- 7. STEERING
- 7.1. Design and function
- 7.1.1. General
- 7.1.2. Mechanical steering
- 7.1.3. Electrical power steering
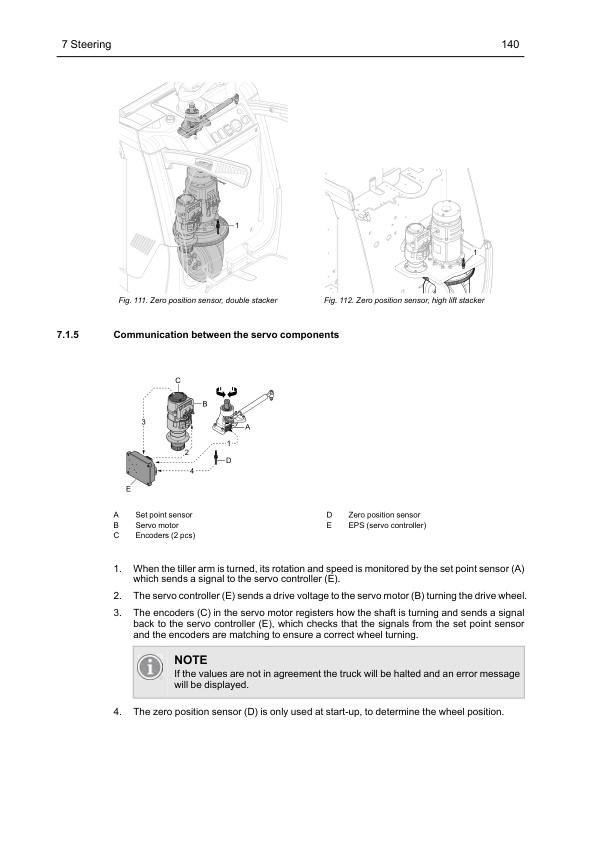
- 7.1.4. Feedback sensors
- 7.1.5. Communication between the servo components
- 7.2. Repair and maintenance instructions
- 7.2.1. Before work is performed
- 7.2.2. Cleaning
- 7.2.3. Tiller arm
- 7.2.4. Mechanical steering
- 7.2.5. Power steering
- 8. HYDRAULIC SYSTEM
- 8.1. Design and function
- 8.1.1. Overview
- 8.1.2. Description
- 8.1.3. Lifting and lowering
- 8.1.4. Hydraulic diagram
- 8.1.5. Hydraulic unit
- 8.1.6. Hydraulic unit valves
- 8.1.7. Hydraulic oil
- 8.2. Repair and maintenance instructions
- 8.2.1. Before work is performed
- 8.2.2. General instructions
- 8.2.3. Installation
- 8.2.4. Connections
- 8.2.5. Hydraulic hoses
- 8.2.6. Start-up
- 8.2.7. Remove and install the hydraulic unit
- 8.2.8. Raise the hydraulic unit, double stacker
- 8.2.9. Hydraulic oil, changing/draining
- 8.2.10. Replace the air filter
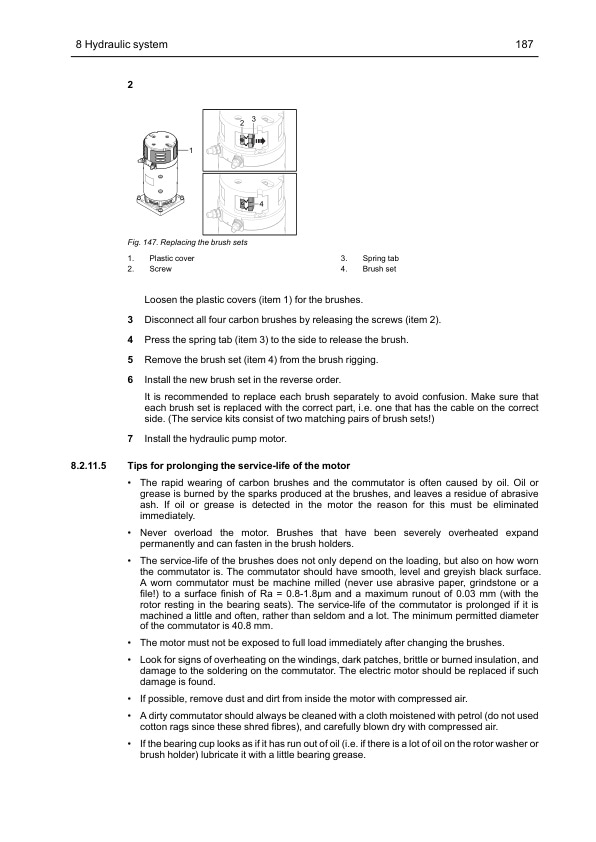
- 8.2.11. Hydraulic motor
- 8.2.12. Hydraulic control valves
- 8.2.13. Installation instruction for pipe couplings
- 8.3. Diagnostics and troubleshooting
- 8.3.1. Symptoms and Actions
- 9. CYLINDERS
- 9.1. Design and function
- 9.1.1. Description
- 9.1.2. Hose break valve
- 9.2. Repair and maintenance instructions
- 9.2.1. Before work is performed
- 9.2.2. Bleeding of the hydraulic cylinders with an air bleed screw
- 9.2.3. Bleeding of the hydraulic cylinders without a bleed air screw
- 9.2.4. Double stacker
- 9.2.5. High lift stacker
- 10. ELECTRICAL SYSTEM
- 10.1. Introduction
- 10.1.1. Overview of components
- 10.1.2. CAN bus communication
- 10.2. Safety
- 10.2.1. Safety instructions
- 10.2.2. Electronic controllers
- 10.2.3. Safety checks
- 10.2.4. Servo steering system
- 10.2.5. Hydraulic system
- 10.2.6. Hydraulic pressure sensors for initial lift and main lift (S26, S30)
- 10.2.7. Brake system
- 10.2.8. Traction system
- 10.2.9. Sensors
- 10.2.10. Maximum drive speed and drive stop
- 10.3. Design and function
- 10.3.1. Battery capacity
- 10.3.2. VCM (Vehicle Control Module) (truck computer)
- 10.3.3. Display
- 10.3.4. CMC (Combi Motor Controller)
- 10.3.5. EPS (Electrical Power Steering) controller
- 10.3.6. Connector specifications
- 10.4. Repair and maintenance instructions
- 10.4.1. Before work is performed
- 10.4.2. Wiring diagram
- 10.4.3. Insulation resistance test
- 10.4.4. Remove and install the battery lock
- 10.4.5. Battery replacement (with rollers)
- 10.4.6. Battery replacement (without rollers)
- 10.4.7. Battery replacement (Lithium-ion)
- 10.4.8. Replacing the Electric panel components
- 10.4.9. Remove and install the VCM
- 10.4.10. Remove and install the emergency stop
- 10.4.11. Remove and install the standard display (HMI-10)
- 10.4.12. Remove and install the multi function display (HMI-20)
- 10.4.13. Replace the Foot protection sensor (S1) Reflector, Fixed rear platform
- 10.4.14. Remove and install the safety sensors
- 10.4.15. TruckTool
- 10.5. Diagnostics and troubleshooting
- 11. SPEED CONTROL AND BRAKE SYSTEMS
- 11.1. Design and function
- 11.1.1. Speed and brake control
- 11.1.2. Electric brake
- 11.2. Repair and maintenance instructions
- 11.2.1. Before work is performed
- 11.2.2. Electric brake
- 11.3. Diagnostics and troubleshooting
- 11.3.1. Troubleshoot the speed controller
- 11.3.2. Troubleshoot the brake
- 12. MISCELLANEOUS
- 12.1. Options
- 12.1.1. Additional equipment
- 12.1.2. Additional equipment overview
- 12.1.3. Battery lock, quick lock (option)
- 12.1.4. Adjustable damped floor (option)
- 12.1.5. Load backrest (option)
- 12.1.6. power supply socket (option)
- 12.1.7. USB-power supply socket (option)
- 12.1.8. Equipment bar installation (option)
- 12.1.9. Work light (only with overhead guard)
- 12.1.10. Floor spot (option)
- 12.1.11. Writing surface installation
- 12.1.12. Foot protection (option)
- 12.1.13. Closed Pallet Entry and Exit (option)
Related products
-
Mitsubishi 1204E Diesel Engine Systems Operation Testing and Adjusting Service Manual 99799-56103
$50.00 Add to cart -
Mitsubishi 1204E Diesel Engine Troubleshooting Service Manual 99799-56104
$50.00 Add to cart -
Mitsubishi 4G15 Gasoline Engine Service Manual 99719-16110
$50.00 Add to cart -
Mitsubishi 4DQ5, S4E, S6E, S6E2 Service Manual 99719-52120
$50.00 Add to cart -
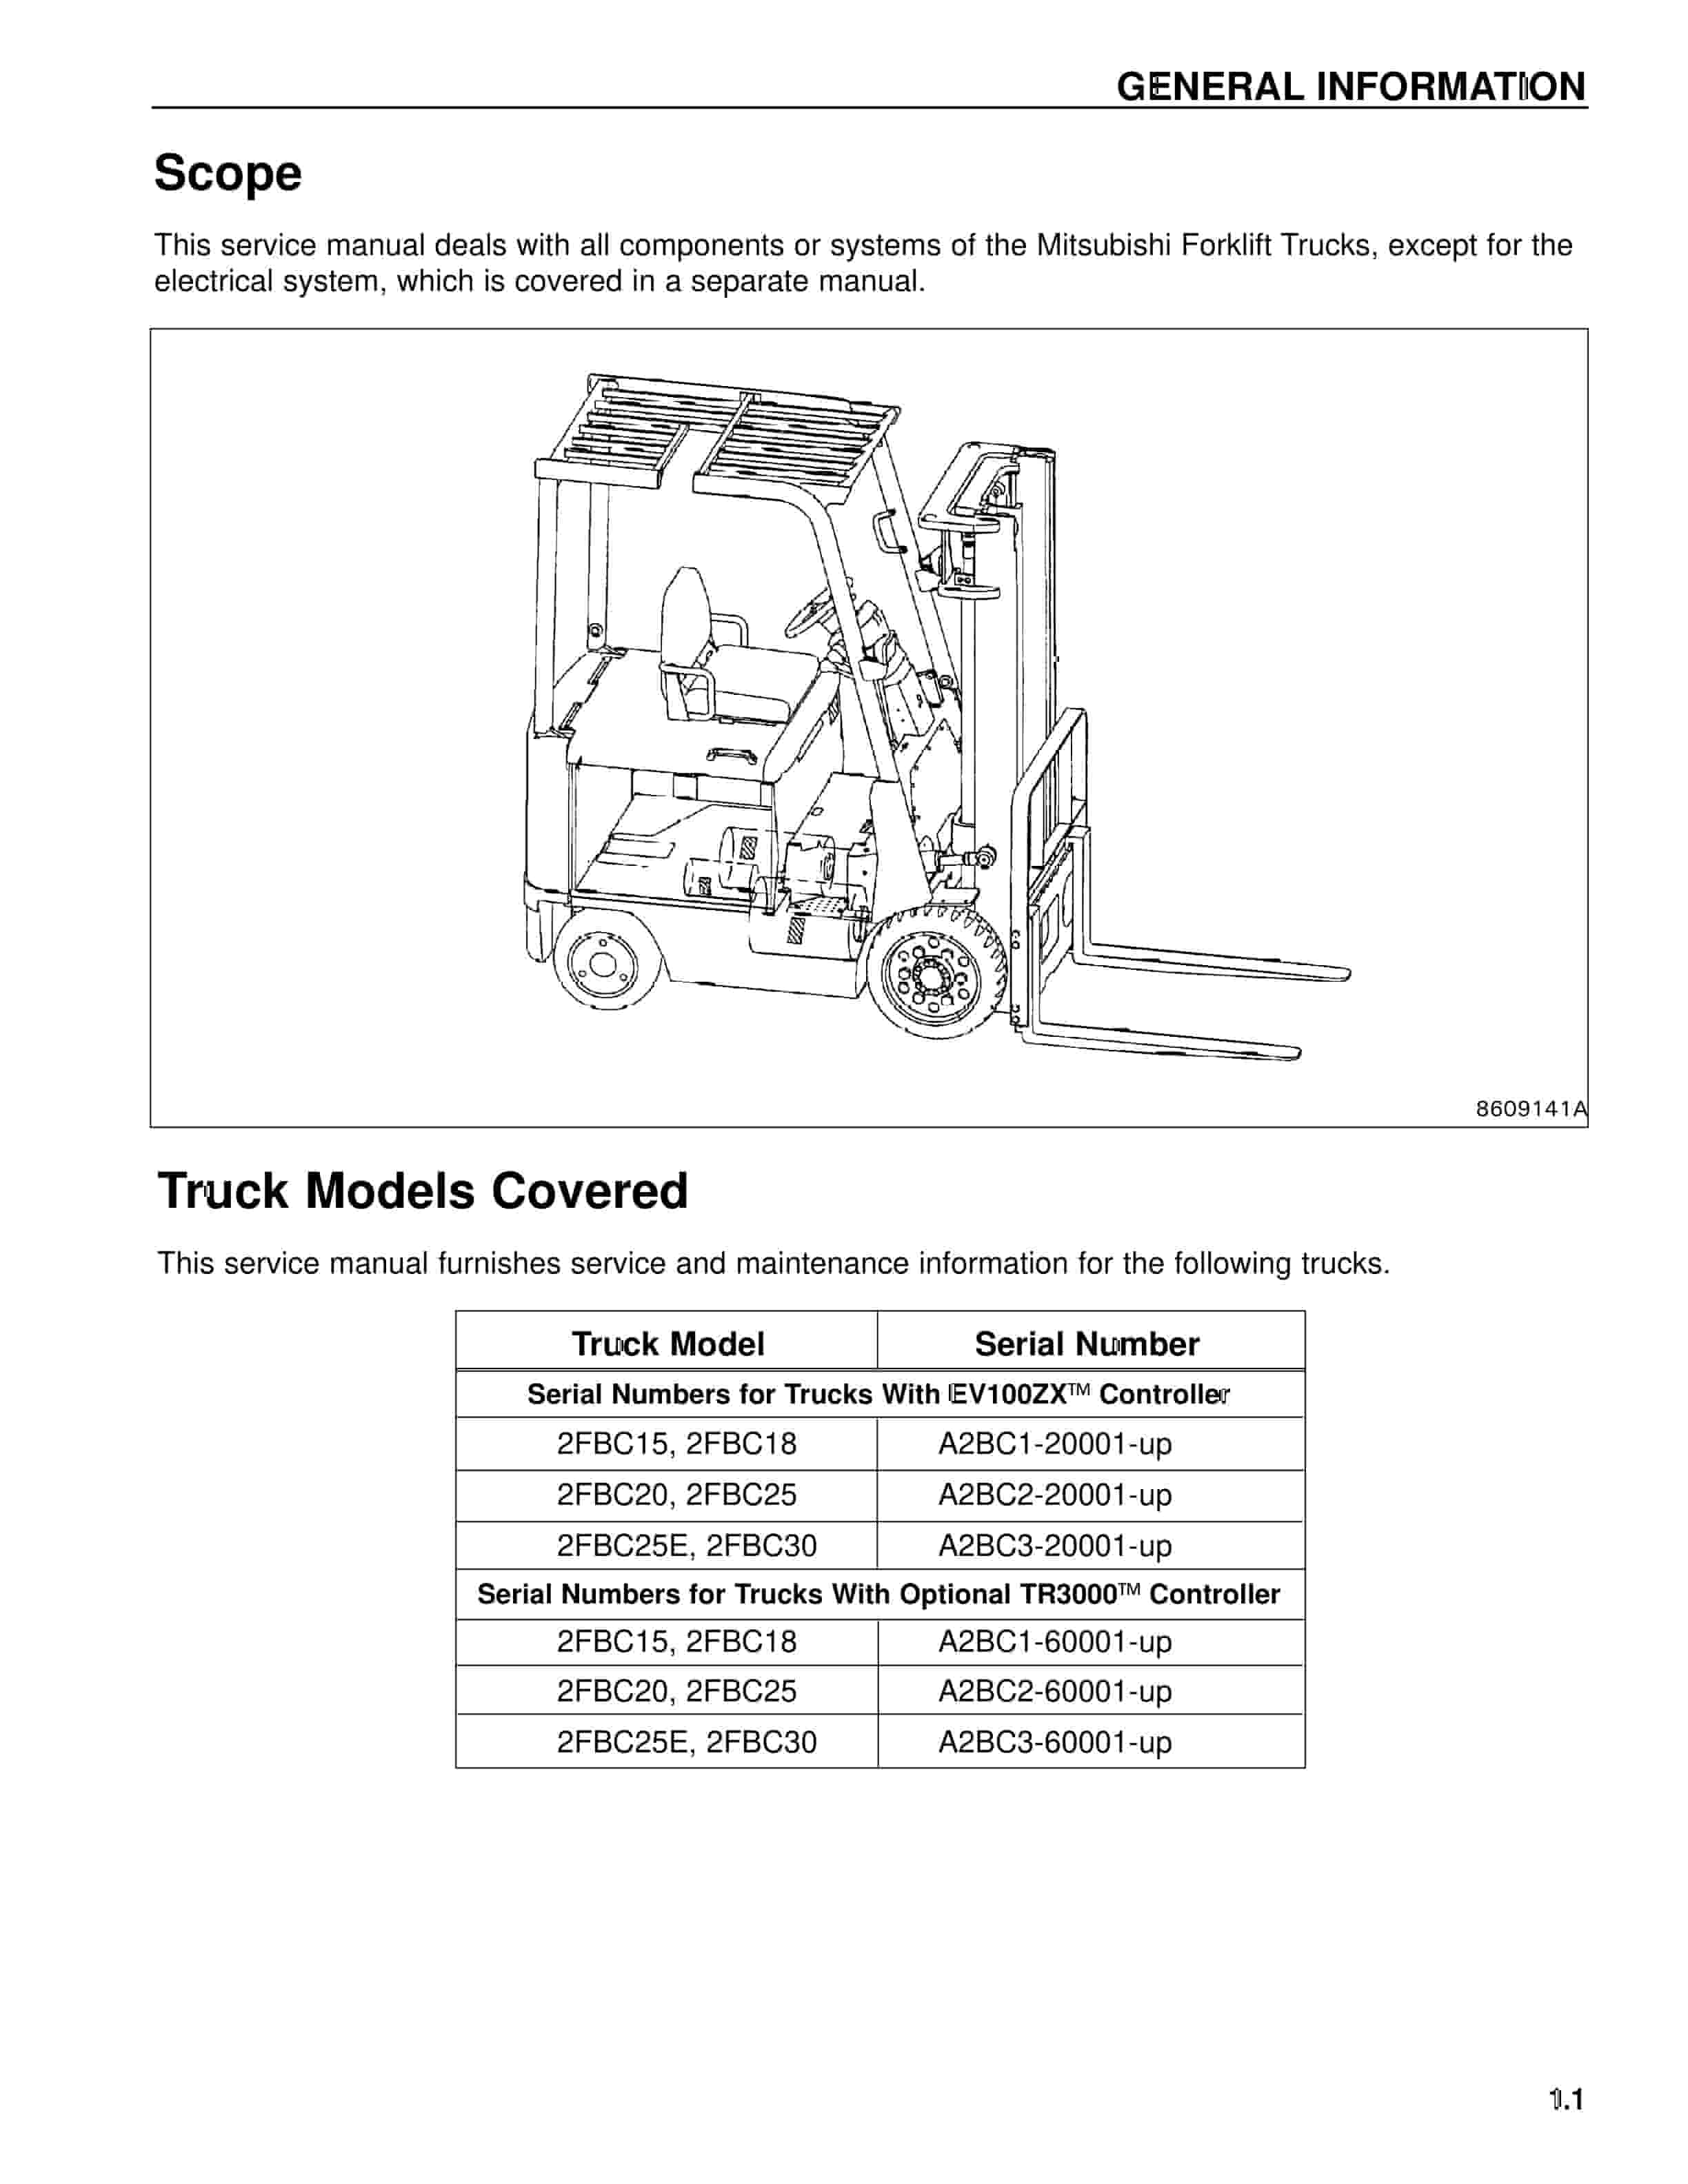
Mitsubishi 2FBC15 Forklift Service Manual
$50.00 Add to cart


